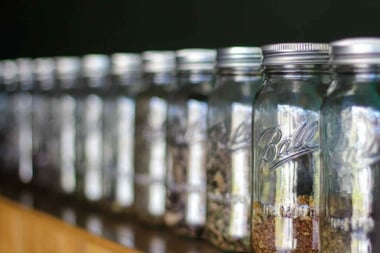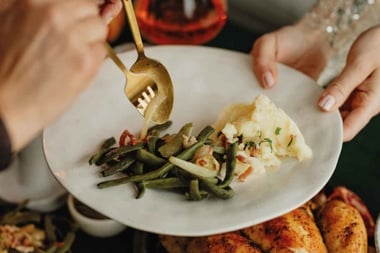
No longer associated with a bygone era, canning has regained popularity as more and more people learn to preserve the goodness of local produce.
In days gone by, the only way to ensure enough food to make it through the long Canadian winters was by preserving the abundant harvest gathered during summer and fall. While preserving local produce was once a common practice, many people no longer have the knowledge or experience.
Today, however, looking to the wisdom and recipes passed down from generation to generation, home cooks are once again capturing the essence of vegetables and fruit at their nutritional peak—with a modern twist—through the art of canning.
What is canning?
Canning, by definition, is applying heat to food in a container with the purpose of removing air, thus creating a vacuum seal that inhibits natural spoilage that would otherwise occur. While our grandmothers may have had their own method for canning, today it is widely recognized that there are two safe and effective home canning methods: boiling water bath canning and pressure canning. Which method you use depends on the temperature needed to kill or deter the growth of harmful bacteria, yeast, or mold in an acidic or non-acidic environment.
Water bath canning
Water bath canning is a great canning method for beginners. Using equipment available in most kitchens, this method is used when canning high-acid foods such as tomatoes, salsa, jellies, pickles, jams, and fruits.
Pressure canning
Pressure canning requires the use of a specialized pressure canner and should only be attempted by home cooks who have more canning experience. This method is best used for preserving low-acid foods such as meats, fish, and non-pickled vegetables.
With the harvest season upon us, why not seize the opportunity to roll up your sleeves and spend an afternoon canning with family or friends? Your meals will be rewarded with the flavourful and nutritious reminders of the best of summer’s bounty.
Note: instructions on how to do water bath canning are found in the “Water bath canning 101” sidebar. All the kitchen equipment you’ll need is itemized in the “Gear up!” sidebar.
Recipes
Water bath canning 101
For those new to canning, processing filled jars in a boiling water bath is the simplest of canning techniques. While not difficult, it is important to follow several steps to ensure that jars properly seal and preserved items remain food safe.
- Wash canning jars, lids, and screw bands in hot, soapy water. Rinse well. Ensure jars are free of damage, as this may prevent sealing or cause breakage.
- Place canning rack in stockpot and place jars on rack. Fill pot with water and bring to a simmer. Keep jars in simmering water until ready to use. This will help minimize the risk of breakage when filling with hot ingredients or liquids.
- Set up all tools needed to fill and process jars. This includes funnel, ladle, tongs, screw bands, paper towel, and jar lifters.
- Bring a small pot of water to just a bare simmer and add lids. Don’t let water boil as it may warm the lids too much, making it difficult for them to seal to the jars.
- Lay out a clean kitchen towel or large cooling rack for processed jars to rest on once out of the water bath.
- Make chosen recipe.
- Remove jars from water with canning tongs and place on a kitchen towel.
- Fill each jar, using funnel and ladle (if applicable), making sure to leave at least 1/2 in (1.25 cm) of head space from the rim of the jar. This allows for expansion of the food during processing.
- Remove air bubbles by placing a non-metallic spatula or chopstick down one side of jar while pressing food against the opposite side of the jar. Continue with this technique twice around the jar. You might find that you can top up the jar, making sure to leave allotted head space.
- Wipe jar rims clean with paper towel. Retrieve a warm lid from small pot with tongs and centre on top of each jar.
- Screw on band until it just stops. If band is secured too tightly, lid will not seal properly during processing.
- Using jar lifters, gently submerge filled jars into a large pot of simmering water, making sure they are covered by at least 1 in (2.5 cm) of water. Cover and bring water to a boil.
- Once water is boiling, boil jars for specific time outlined in recipe.
- Remove jars with canning tongs and set on a cooling rack or clean towel. Leave jars to cool, undisturbed, for 12 to 24 hours.
- Check seal to ensure that the lid does not flex up or down when gently pressed. If lid does move, store jar in refrigerator and start to enjoy right away.
Canning highs and lows
The altitude at which you do your canning will affect the amount of processing time needed. The reason for this is once you get more than 1,000 ft (305 m) above sea level, the temperature at which water boils is lower. Thus, if you live in Calgary at an elevation of 3,438 ft (1,084 m), even if your water is boiling, it may not be hot enough to properly seal and preserve your ingredients. Adjust water bath processing times according to the following chart:
| Altitude (ft) | Altitude (m) | Additional processing time (minutes) |
| 001 - 3,000 | 305 - 914 | 5 |
| 3,001 - 6,000 | 915 - 1,828 | 10 |
| 6,001 - 8,000 | 1,829 - 2,438 | 15 |
| 8,001 - 10,000 | 2,439 - 3,048 | 20 |
Too hot to handle
When cutting up jalapeno or poblano peppers, wear latex or rubber kitchen gloves to prevent burns to your skin. Avoid touching your eyes, as capsaicin, an oil found in these peppers, can cause painful irritation.
Gear up!
The right tools, peak seasonal ingredients, and a tried and tested recipe are the keys to successful home canning. To make the recipes in this article, almost all of the equipment you need can be found in your kitchen right now.
- Mason jars with a two piece sealing system (lid with a ring of rubber compound and corresponding screw band)
- large, deep stockpot with a lid
- canning rack or small baking rack that will fit inside the stockpot (alternatively, you can line the bottom of the pot with extra screw bands or a thick kitchen towel)
- rubber-coated canning tongs or a waterproof silicone oven glove
- wide mouth, non-metallic funnel
- tongs
- ladle
- pots in which to prepare canning recipe
- measuring cups and spoons
- weight scale
- fabric kitchen towels and paper towel
Pickling precaution
If your area has hard water with a high mineral content it may lower the acidity of your pickling liquid, which can spell disaster during long-term storage. Instead, use distilled water to achieve pickled perfection.


